Breads from all over the world

sister herb

Official TTI Chef
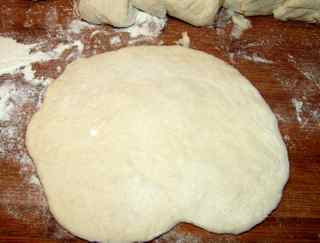
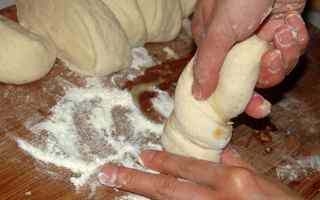
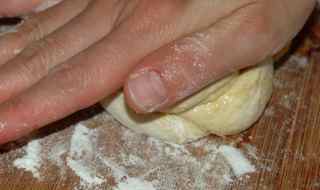
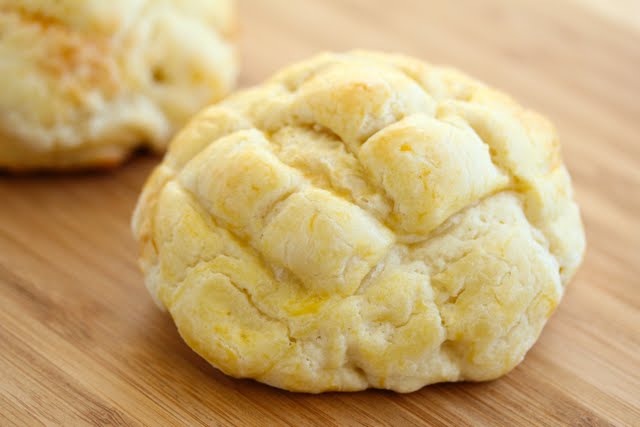
Bread is a staple food prepared from a dough of flour and water, usually by baking. Throughout recorded history it has been popular around the world and is one of humanity's oldest foods, having been of importance since the dawn of agriculture.

There are many combinations and proportions of types of flour and other ingredients, and also of different traditional recipes and modes of preparation of bread. As a result, there are wide varieties of types, shapes, sizes, and textures of breads in various regions. Bread may be leavened by many different processes ranging from the use of naturally occurring microbes (for example in sourdough recipes) to high-pressure artificial aeration methods during preparation or baking. However, some products are left unleavened, either for preference, or for traditional or religious reasons. Many non-cereal ingredients may be included, ranging from fruits and nuts to various fats. Commercial bread in particular, commonly contains additives, some of them non-nutritional, to improve flavour, texture, colour, or shelf life.

Depending on local custom and convenience, bread may be served in various forms at any meal of the day. It also is eaten as a snack, or used as an ingredient in other culinary preparations, such as fried items coated in crumbs to prevent sticking, or the bland main component of a bread pudding, or stuffings designed to fill cavities or retain juices that otherwise might drip away.

Bread is one of the oldest prepared foods. Evidence from 30,000 years ago in Europe revealed starch residue on rocks used for pounding plants. It is possible that during this time, starch extract from the roots of plants, such as cattails and ferns, was spread on a flat rock, placed over a fire and cooked into a primitive form of flatbread. Around 10,000 BC, with the dawn of the Neolithic age and the spread of agriculture, grains became the mainstay of making bread. Yeast spores are ubiquitous, including the surface of cereal grains, so any dough left to rest will become naturally leavened.

Basic types

Bread is the staple food of the Middle East, North Africa, Europe, and in European-derived cultures such as those in the Americas, Australia, and Southern Africa, in contrast to East Asia where rice is the staple. Bread is usually made from a wheat-flour dough that is cultured with yeast, allowed to rise, and finally baked in an oven. Owing to its high levels of gluten (which give the dough sponginess and elasticity), common wheat (also known as bread wheat) is the most common grain used for the preparation of bread.

Bread is also made from the flour of other wheat species (including durum, spelt and emmer), rye, barley, maize (corn), and oats, usually, but not always, in combination with wheat flour. Spelt bread (Dinkelbrot) continues to be widely consumed in Germany, and emmer bread was a staple food in ancient Egypt.

Canadian bread is known for its heartier consistency due to high protein levels in Canadian flour.

Pita is an ancient semi-leavened bread widespread in the Middle East, Levant and South Eastern Europe.

White bread is made from flour containing only the central core of the grain (endosperm).

Brown bread is made with endosperm and 10% bran. It can also refer to white bread with added colouring (often caramel colouring) to make it brown; this is commonly labeled in America as wheat bread (as opposed to whole-wheat bread).

Wholemeal bread contains the whole of the wheat grain (endosperm, bran, and germ). It is also referred to as "whole-grain" or "whole-wheat bread", especially in North America.

Wheat germ bread has added wheat germ for flavoring.

Whole-grain bread can refer to the same as wholemeal bread, or to white bread with added whole grains to increase its fibre content, as in "60% whole-grain bread".

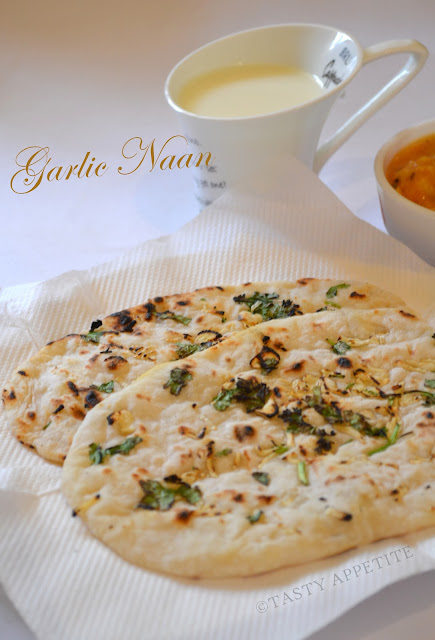
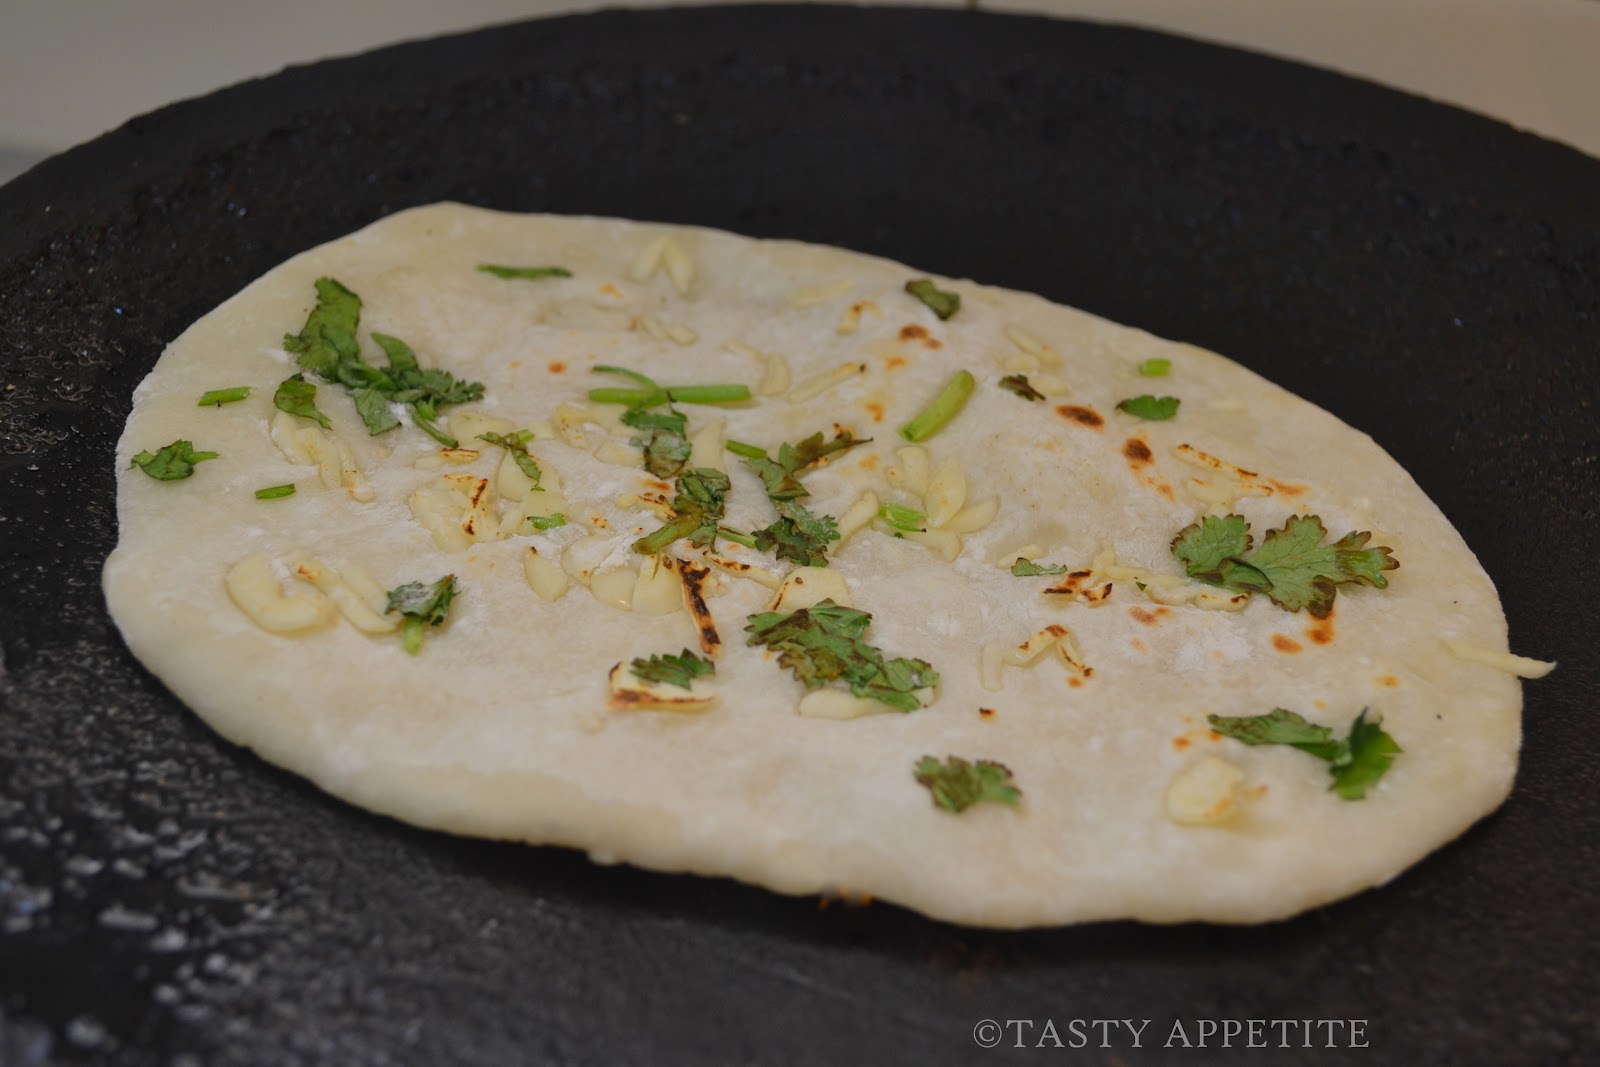
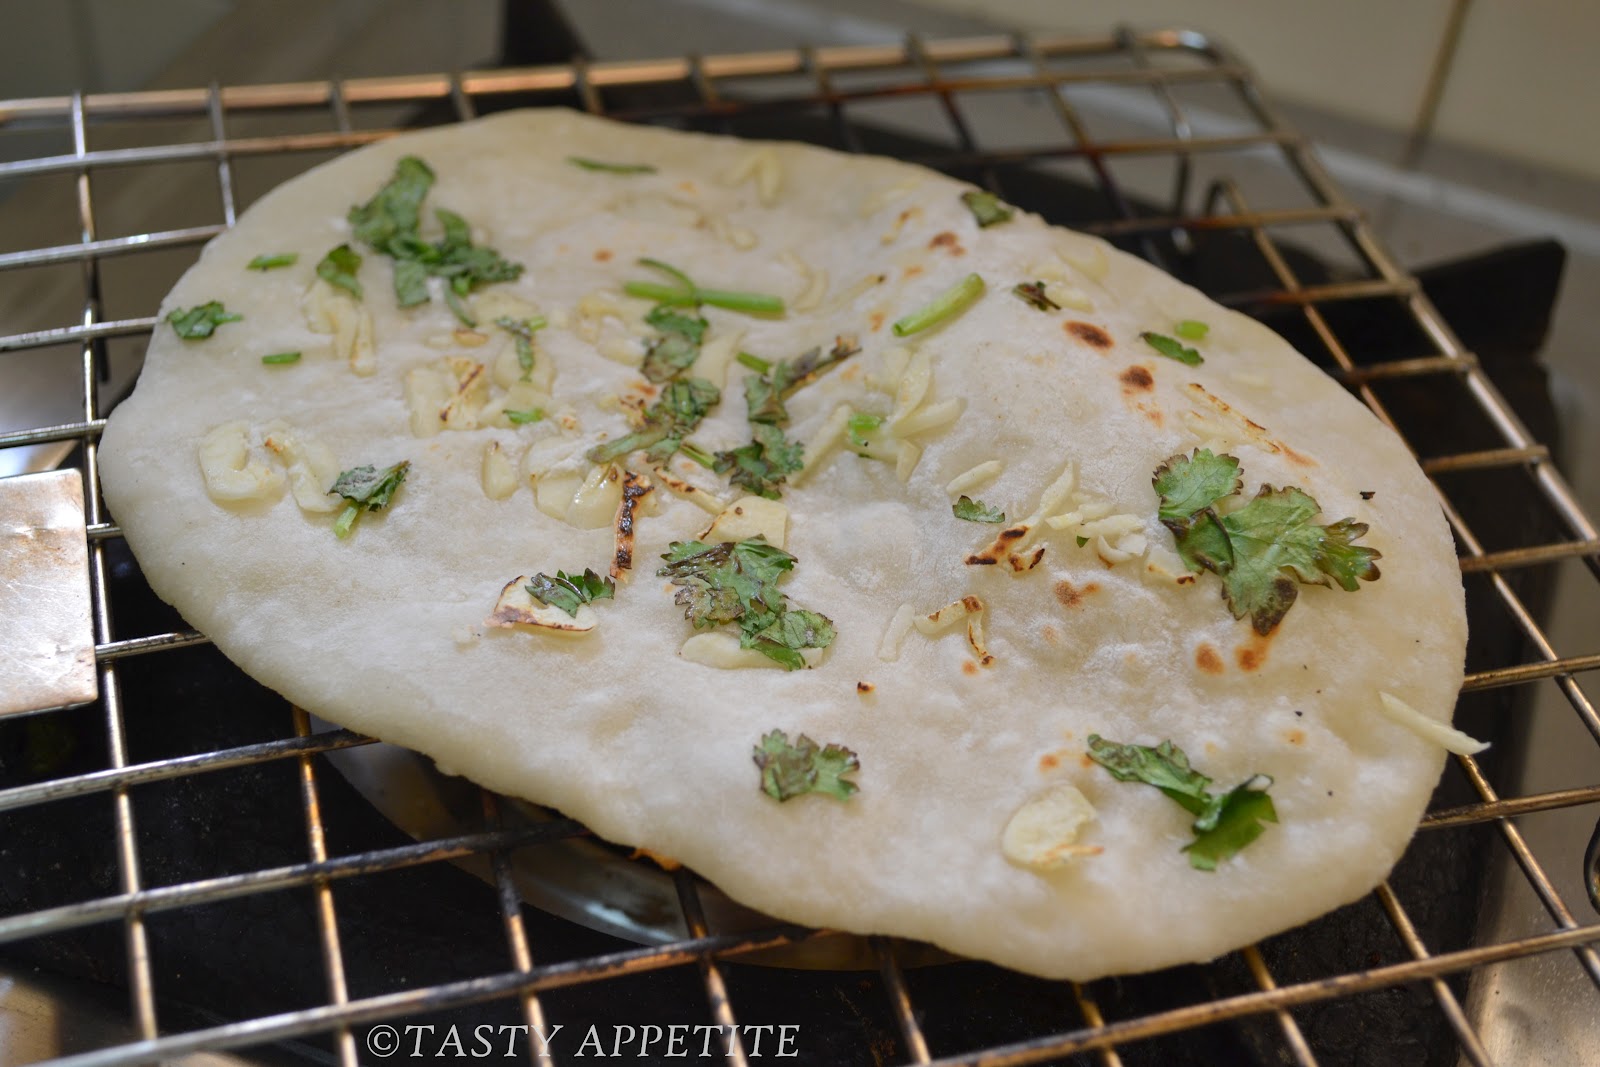
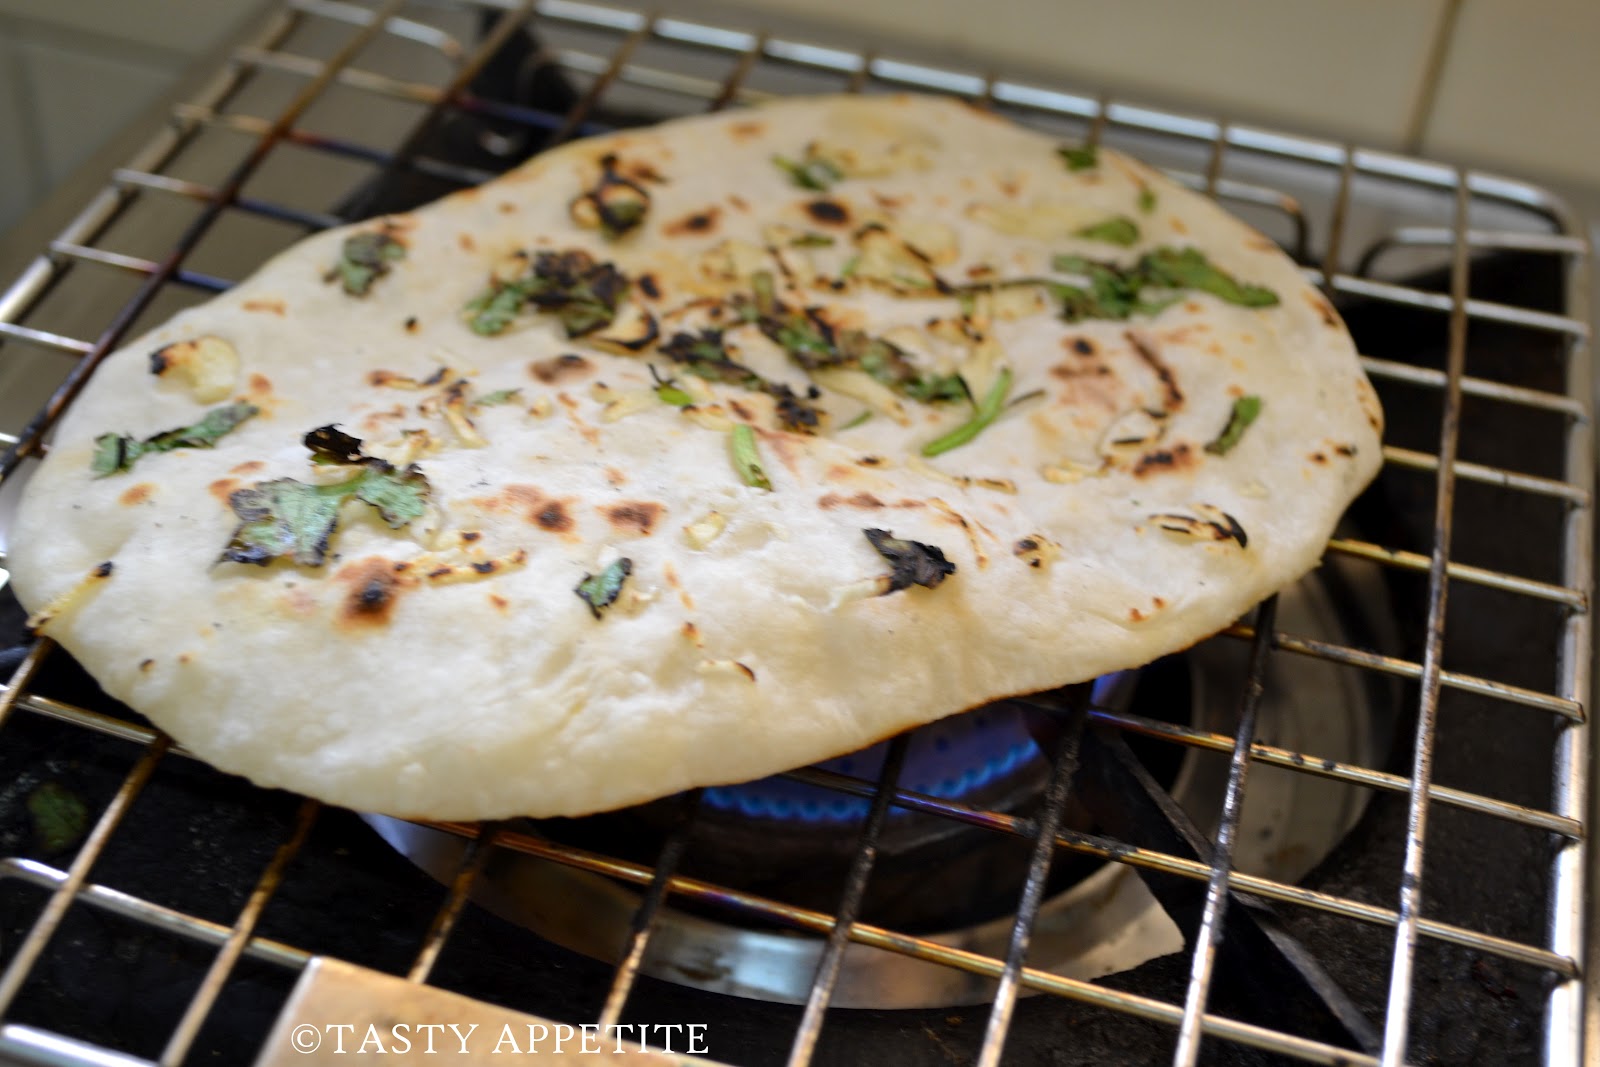
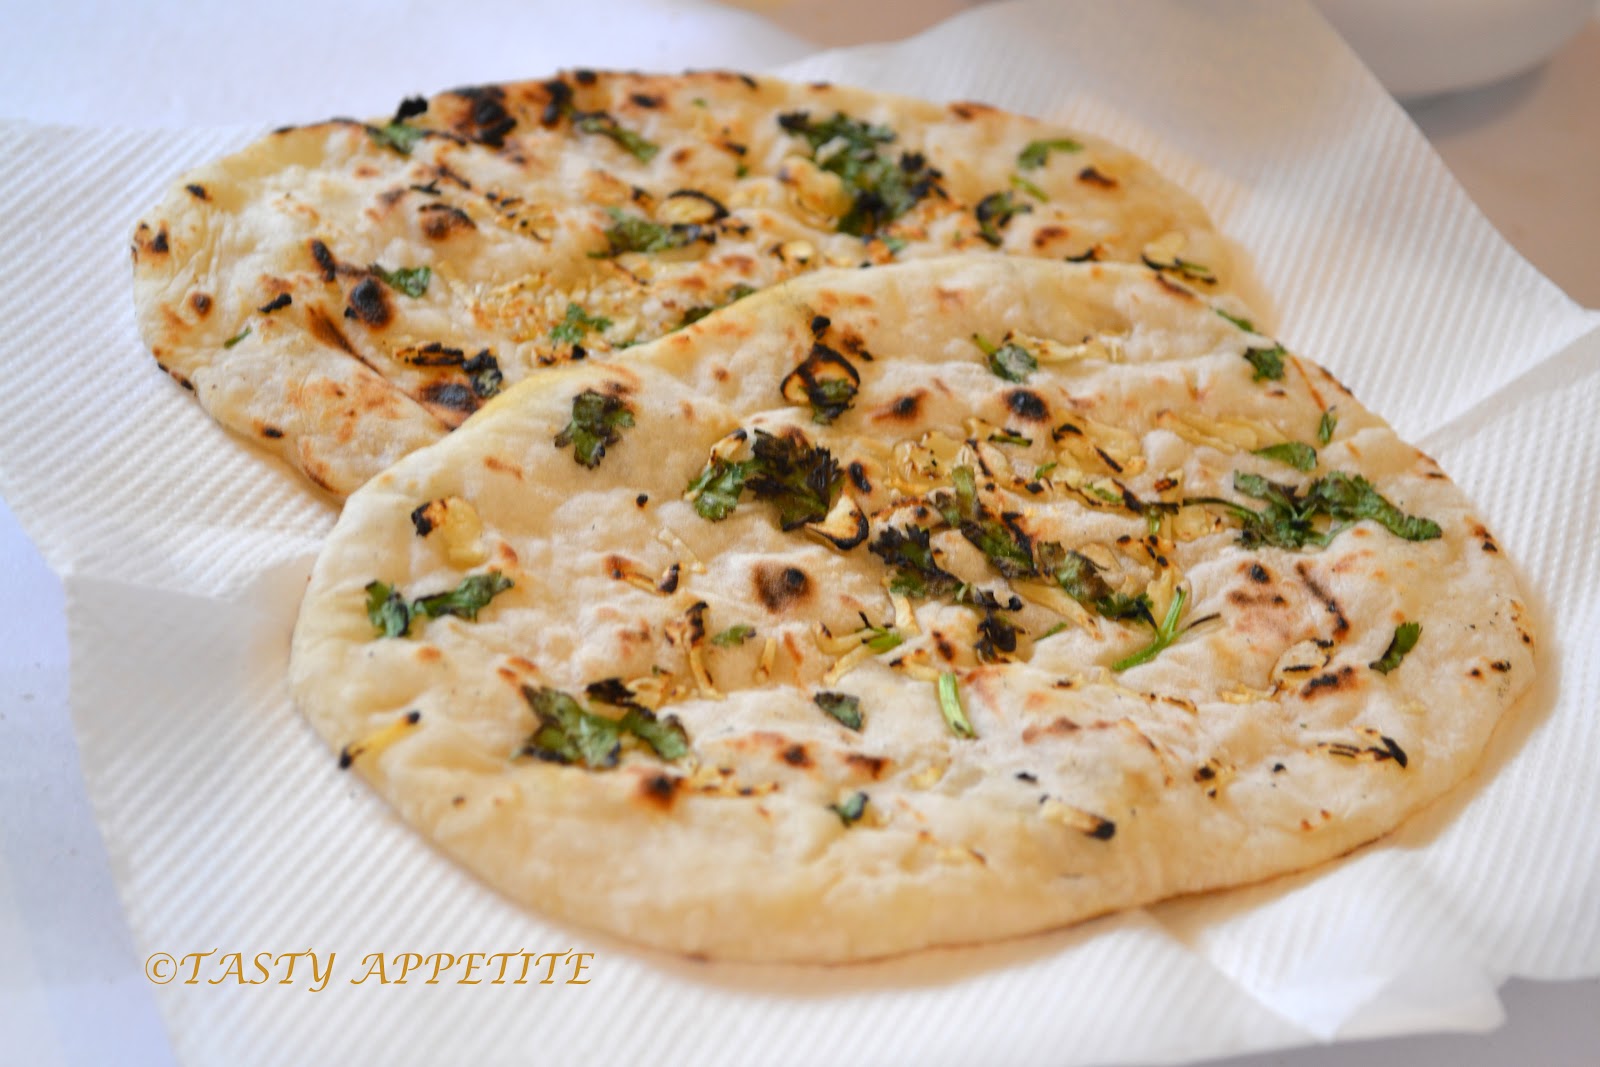
Roti is a whole-wheat-based bread eaten in South Asia. Chapatti is a type of roti. Naan is a leavened equivalent to these.

Granary bread (a registered trademark, owned by Rank Hovis) is made from flaked wheat grains and white or brown flour. The standard malting process is modified to maximise the maltose or sugar content but minimise residual alpha amylase content. Other flavour components are imparted from partial fermentation due to the particular malting process used and to Maillard reactions on flaking and toasting.

Rye bread is made with flour from rye grain of varying levels. It is higher in fiber than many common types of bread and is often darker in color and stronger in flavor. It is popular in Scandinavia, Germany, Finland, the
Baltic States, and Russia.

Unleavened bread or matzo, used for the Jewish feast of Passover, does not include yeast, so it does not rise.
Sourdough bread is made with a starter.

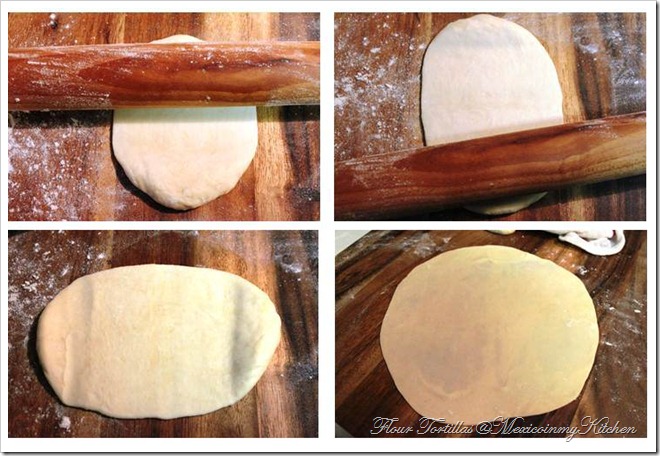
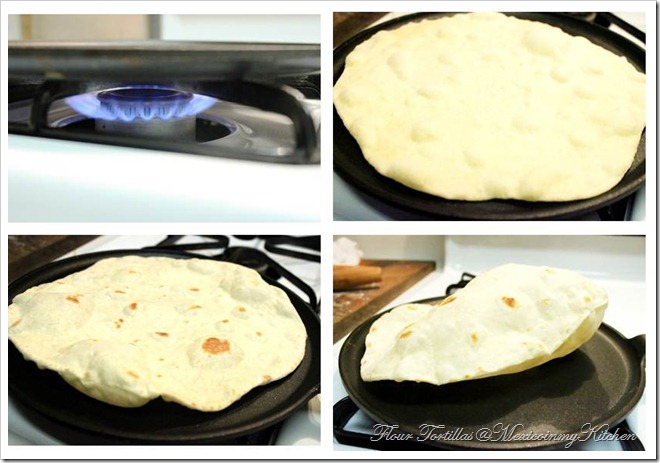
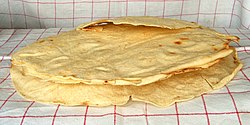
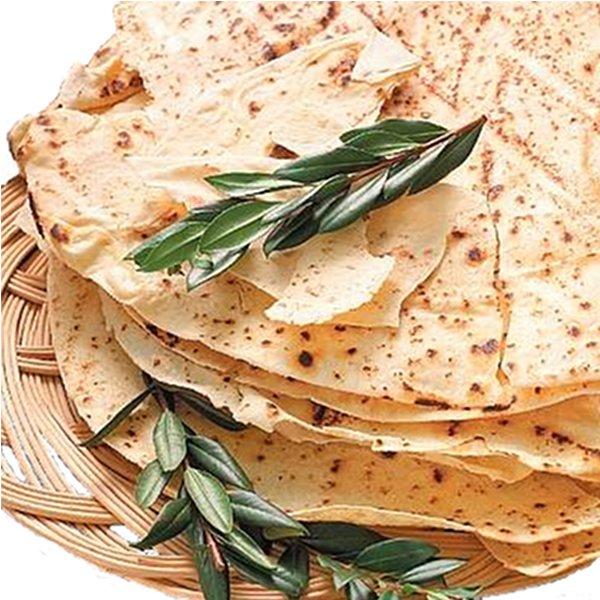
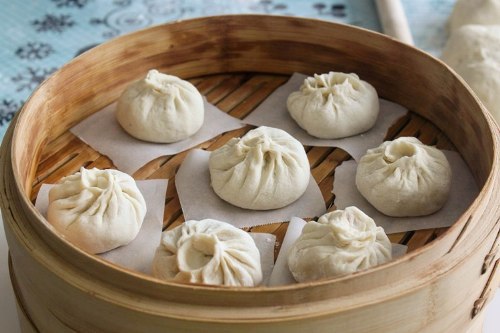
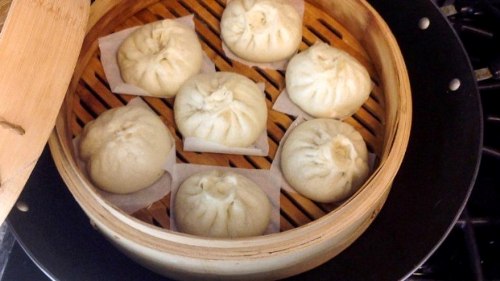
Flatbread is often simple, made with flour, water, and salt, and then formed into flattened dough; most are unleavened, made without yeast or sourdough culture, though some are made with yeast.

Crisp bread is a flat and dry type of bread or cracker, containing mostly rye flour.

Hemp bread includes strongly flavored hemp flour or seeds. Hemp has been used for thousands of years in traditional Chinese medicine. Hemp flour is the by-product from pressing the oil from the seeds and milling the residue. It is perishable and stores best in the freezer. Hemp dough won't rise due to its lack of gluten, and for that reason it is best mixed with other flours. A 5:1 ratio of wheat-to-hemp flour produces a hearty, nutritious loaf high in protein and essential fatty acids. Hemp seeds have a relatively high oil content of 25–35%, and can be added at a rate up to 15% of the wheat flour. The oil's omega-6-to-omega-3 ratio lies in the range of 2:1-to-3:1, which is considered ideal for human nutrition.

Quick breads usually refers to a bread chemically leavened, usually with both baking powder and baking soda, and a balance of acidic ingredients and alkaline ingredients. Examples include pancakes and waffles, muffins and carrot cake, Boston brown bread, and zucchini and banana bread.

Gluten-free breads have been created in recent years due to the discovery that celiac disease sufferers benefit from a gluten-free diet. Other health benefits have also been attributed to gluten-free diets.[citation needed]

Gluten-free bread is made with ground flours from a variety of materials such as almonds, rice (rice bread), sorghum (sorghum bread), corn (cornbread), or legumes such as beans (bean bread), but since these flours lack gluten it can be difficult for them to retain their shape as they rise and they may be less "fluffy".

Additives such as xanthum gum, guar gum, hydroxypropyl methylcellulose (HPMC), corn starch, or eggs are used to compensate for the lack of gluten.

List of breads:

http://en.wikipedia.org/wiki/List_of_breads
 

sister herb

Official TTI Chef
Garlic Naan (yeast-free)

gn+last.jpg


All Purpose Flour / Maida - 2 cups
Baking pwd - 1 tsp
Baking soda - 1 tsp
Salt - 1 tsp
Yoghurt - ¼ cup
Lemon juice - 1 tbsp
Grated garlic - 3 to 4 tbsp
Finely chopped coriander leaves - ¼ cup

Method:

Take Maida flour in a wide bowl.


Add baking pwd, baking soda and salt.
Mix all the ingredients together.
Add yoghurt and combine.


Now add little water and knead to smooth dough.


The perfect consistency of the dough should be soft & sticky to hands.


Finally add lemon juice and mix it well.


Cover it with a damp cloth & keep it in warm place for 3 to 4 hrs.
You can see the dough has rised up so nicely.


The consistency of the dough is still more sticky now.


Sprinkle little maida flour and try to roll it to small balls. ( take care not to add more flour, as it makes the dough thick )


This dough can also be used for pizza’s & breads
Now dust your hands with flour and just press the dough ball to oval shape.of ½ inch thickness ( or roll it gently with rolling pin )


Grate garlic and coriander leaves finely.


Sprinkle them on top of naan.


Roll it slightly with rolling pin, so that it gets pressed along the naan.


Now for roasting, we need a hot skillet & a wire rack over stove top.
( we can bake it in oven also, by setting oven at maximum temp. like 550 degree Farenheit for 7 mins or until baked )
For roasting it in skillet, heat the skillet until its hot.
Place the naan over it.


When small bubbles start appearing on top of naan, roast it on other side.
Once it gets slightly golden spots on the other side as well, take out from skillet.


sister herb

Official TTI Chef
Place it on wire rack and put it on direct heat.


Keep the flame in medium to low heat ( take care not to burn the naan )
Flip it over to next side.


You can see how nicely the naan puffs up in the wire rack.


When its cooked on both sides, take it out.


Brush some butter over it.
It has got very nice crunchy outside & very soft, moist flaky inside with a tempting aroma from garlic & coriander leaves. ( can also sprinkle little chat masala over it for added flavor )


Perfect flaky restaurant style Garlic Naan is ready.


Enjoy hot with any North Indian curry.


Source: http://www.tastyappetite.net/2012/06/how-to-make-garlic-naan-yeast-free-step.html
 

sister herb

Official TTI Chef
Finnish Whole-Wheat Flatbread

Finnish%2BWhole%2BWheat%2BFlatbread%2Bby%2BKitchen%2BParade%2B2003-400.JPG


Hands-on time: 15 minutes
Time to table: 55 minutes
Makes 12 wedges, easily halved for 6

1-1/2 cups flour, fluffed to aerate before measuring or 185g (See Note)
3/4 cup whole wheat flour or bread flour, fluffed to aerate or 95g
2 tablespoons sugar
1-1/2 teaspoons baking powder
1/2 teaspoon baking soda
1 teaspoon table salt
4 tablespoons (1/2 stick) cold butter
1 cup buttermilk

Additional flour, for kneading
For the top, good salt
1 teaspoon olive oil or melted butter

Preheat oven to 350 F/175 C. Place parchment paper on a baking sheet.

Combine flours, sugar, baking powder, baking soda and salt in a mixing bowl.

With the large holes of a cheese grater, "grate" the butter to create the perfect size pieces for flaky, tender bread. With your hands, toss the butter into the flour mixture to coat and distribute; work quickly, you don't want the heat of your hands to soften the butter.

Make a well in the center of the flour mixture, pour in buttermilk and with your hands, work in until just moistened. Knead the dough for two or three rounds right in the bowl, then pull out onto a floured surface and knead for 3 - 5 minutes. Add flour to keep from sticking but use as little as possible, the more flour, the heavier the bread. As the leavening begins to work, you'll feel the dough begin to firm up and "poof".

Shape dough into a flat round with smooth edges and arrange on the parchment paper. With a benchknife or the dull side of a knife, "score" the dough into twelve pieces (or as many as you want), cutting into the dough without cutting all the way through. Sprinkle with a little salt.

Bake for 30 minutes or until the top is turning gold. Remove from oven and brush lightly with olive oil. Cool for 10 minutes, then serve immediately.

Note:

FLUFF TO AERATE BEFORE MEASURING When flour sits, it settles. As you stir the flour for just a few seconds, you'll add air and actually feel it lighten. By fluffing the flour first, you'll use as much as 25% less flour, by weight. The result is that all your baked goods will turn out noticeably lighter -- pancakes, muffins, cakes and cookies. I keep a spoon right in the flour canister, so never forget and rarely, rarely get out the flour sifter, which performs much the same function.

Source: http://www.kitchenparade.com/2003/01/finnish-whole-wheat-flatbread.html
 

sister herb

Official TTI Chef
Pita Bread

IMG_4505asmall.jpg


Ingredients

3 cups whole wheat flour
1 tbsp sugar or honey
1 1/4 cups water (roughly room temperature)
2 tbsp olive oil, butter, or coconut oil
2 tbsp whey or lemon juice

Instructions

The night before you want to serve this light, airy bread, mix the above ingredients together.

Leave covered on the counter for 12-24 hours.

After the flour has soaked add: 1 1/2 teaspoons of salt and 1 packet of yeast (2 tsp).

Follow the instructions as given on the The Fresh Loaf (see below).

All of the ingredients should form a ball. If some of the flour will not stick to the ball, add more water (I had to add an extra 1/4 cup).

Once all of the ingredients form a ball, place the ball on a work surface, such as a cutting board, and knead the dough for approximately 10 minutes (or until your hands get tired). If you are using an electric mixer, mix it at low speed for 10 minutes.

(The purpose of kneading is to thoroughly combine the ingredients and to break down the flour so that the dough will become stretchy and elastic and rise well in the oven. A simple hand kneading technique is to firmly press down on the dough with the palm of your hand, fold the dough in half toward you like you are closing an envelope, rotate the dough 90 degrees and then repeat these steps, but whatever technique you are comfortable using should work.)

When you are done kneading the dough, place it in a bowl that has been lightly coated with oil. I use canola spray oil, but you can also just pour a teaspoon of oil into the bowl and rub it around with your fingers. Form a ball out of the dough and place it into the bowl, rolling the ball of dough around in the bowl so that it has a light coat of oil on all sides. Cover the bowl with plastic wrap or a damp kitchen towel and set aside to rise until it has doubled in size, approximately 90 minutes.

When it has doubled in size, punch the dough down to release some of the trapped gases and divide it into 8 pieces. Roll each piece into a ball, cover the balls with a damp kitchen towel, and let them rest for 20 minutes. This step allows the dough to relax so that it’ll be easier to shape.


While the dough is resting, preheat the oven to 400 degrees. If you have a baking stone, put it in the oven to preheat as well.

If you do not have a baking stone, turn a cookie sheet upside down and place it on the middle rack of the oven while you are preheating the oven. This will be the surface on which you bake your pitas.

After the dough has relaxed for 20 minutes, spread a light coating of flour on a work surface and place one of the balls of dough there. Sprinkle a little bit of flour on top of the dough and use a rolling pin or your hands to stretch and flatten the dough. You should be able to roll it out to between 1/8 and 1/4 inch thick. If the dough does not stretch sufficiently you can cover it with the damp towel and let it rest 5 to 10 minutes before trying again.


If you have a spray bottle in the kitchen, spray a light mist of water onto your baking surface and close the oven for 30 seconds. Supposedly this step reduces the blistering on the outside of your pitas. I’ve skipped it many times in the past and still been pleased with my breads, so if you don’t have a bottle handy it isn’t a big deal.

Open the oven and place as many pitas as you can fit on the hot baking surface. They should be baked through and puffy after 3 minutes. If you want your pitas to be crispy and brown you can bake them for an additional 3 to 5 minutes, but it isn’t necessary.


Dip in some hummus or make a falafel pita sandwich with yogurt sauce. Enjoy!

Source: http://www.mommypotamus.com/soaked-pita-bread-recipe/


sister herb

Official TTI Chef
Chapathi

chapati-chapathi-wheat-flour-chapati-recipe.jpg


Ingredients:

Wheat flour- 2 cup
Milk- 1/4 cup
Water- 1/4 cup
Salt- to taste
Oil- as required

Recipe:

Take Wheat flour and Salt in a vessel. Add Milk and mix till the flour like shreds.
Then add Water (if required add some more water) and start kneading till it turns into firm and soft dough.
Make dough into round shape and apply Oil over the dough.
Place the dough in a vessel and cover it with a lid for ½ an hour.
After that make small balls of the dough and roll it into flat and round shaped Chapathi sheets. Apply flour if the dough sticks while rolling.
Heat a pan and place the Chapathi, turn Chapathi for every 10 to 15 sec.
Remove from heat once its slightly burnt on both the sides.

Source: http://www.samai.in/recipes/chapthi...wheat-flour-chapati-indian-flat-bread-recipe/
 

sister herb

Official TTI Chef
Some Italian breads

Olive & Rosemary Focaccia

1789_l.jpg


310 ml (1 1/4 cups) warm water
2 teaspoons (7g/1 sachet) dried yeast
2 teaspoons caster sugar
3 1/2 tablespoons olive oil
450 g (3 cups) plain flour
2 teaspoons sea salt flakes
1 1/2 tablespoons fresh rosemary leaves
20 pitted kalamata olives

Combine the water, yeast, sugar and 2 tablespoons of oil in a small bowl. Set aside in a warm, draught-free place for 5 minutes or until frothy.

Place flour and half of the sea salt in a bowl. Make a well in the centre and pour in yeast mixture. Use a wooden spoon to stir until combined, then use your hands to bring the dough together in the bowl.

Turn onto a lightly floured surface and knead for 10 minutes or until smooth and elastic. Brush a bowl with oil to grease. Place dough in bowl and cover with plastic wrap or a damp tea towel. Set aside in a warm, draught-free place for 45 minutes or until doubled in size.

Preheat oven to 200 C. Brush a 20 x 30cm Swiss roll pan with 2 teaspoons of remaining oil. Punch down centre of the dough with your fist. Turn onto a lightly floured surface and knead for 2 minutes or until dough is elastic and has returned to original size. Press into the prepared pan. Cover with a damp tea towel and set aside in a warm, draught-free place to prove for 20 minutes or until doubled in height. Use your finger to press dimples into the dough. Brush with remaining oil and sprinkle over rosemary and remaining salt. Press the olives into the dough.

Bake in oven for 25-30 minutes or until golden and focaccia sounds hollow when tapped on base. Serve warm or at room temperature.

Source: http://www.taste.com.au/recipes/1789/olive rosemary focaccia

Note: Focaccia is a flat oven-baked Italian bread product similar in style and texture to pizza doughs. It may be topped with herbs or other ingredients.

Focaccia is popular in Italy and is usually seasoned with olive oil, salt, sometimes herbs, and may at times be topped with onion, cheese and meat. It might also be flavored with a number of vegetables.

Focaccia can be used as a side to many meals, as a base for pizza, or as sandwich bread.
 
Last edited:

sister herb

Official TTI Chef
Muffuletta

Muffuletta1.jpg


The muffuletta is both a type of round Sicilian sesame bread and a popular sandwich originating among Italian immigrants in New Orleans, Louisiana using the same bread. It is a large, round, and somewhat flattened loaf with a sturdy texture, around 10 inches across. It is described as being somewhat similar to focaccia. Bread used for the Muffuletta is different from focaccia, however, in that it is a very light bread,the outside is crispy and the inside is soft. It also has no additional seasonings baked into it, aside from the sesame seeds. The bread is more like French bread, but a tad heavier.

Ingredients:

1 cup lukewarm water
2 tablespoons extra-virgin olive oil
1 tablespoon granulated sugar
1 1/2 teaspoons salt
3 cups bread flour or all-purpose flour
3 teaspoons instant active dry yeast
Cornmeal
Sesame seeds
Olive oil

Preparation:

Using your mixer with dough hook, place water, olive oil, sugar, salt, flour, and yeast in the bowl. Beat until smooth. If using your bread machine, select dough setting and press start. When dough cycle has finished, remove dough from pan and turn out onto a lightly oiled surface. Form dough into an oval, cover with plastic wrap, and let rest for 10 minutes.

After resting, turn dough bottom side up and press to flatten. Form dough into a one-inch high circle and place on a baking sheet dusted with cornmeal. Press sesame seeds into surface of dough and brush with olive oil. Cover with plastic wrap and let rise in a warm place 30 to 50 minutes or until doubled in size.

Preheat oven to 425 degrees F. After rising, bake for 10 minutes. Reduce heat to 375 degrees F. and bake 15 minutes or until loaf sounds hollow when tapped.

Remove from oven and cool on a wire rack before slicing.

Makes 1 loaf.

Source: http://whatscookingamerica.net/Bread/MuffulettaBread.htm
 

sister herb

Official TTI Chef
Pane carasau

250px-Pane_carasau.jpg


Pane carasau is a traditional flatbread from Sardinia.

It is thin and crisp, usually in the form of a dish half a meter wide. It is made by taking baked flat bread (made of durum wheat flour, salt, yeast and water), then separating it into two sheets which are baked again. The recipe is very ancient and was conceived for shepherds, who used to stay far from home for months at a time. Pane carasau can last up to one year if it is kept dry. The bread can be eaten either dry or wet (with water, wine, or sauces).

A similar, yeast-free bread is called carta di musica in Italian, meaning music sheet, in reference to its large and paper-thin shape, which is so thin before cooking that a sheet of music can be read through it.

Remains of the bread were found in archeological excavations of nuraghi (traditional Sardinian stone buildings) and it was therefore already eaten on the island prior to 1000 BC.

The name of the bread comes from the Sardinian word “carasare”, referring to the crush of bread.


Carta da Musica/Pane Carasau

qfzNV1GbB7itB34Rfb2PrTGuYDqlBjSWYo9KdoEbekjOueXxWfuPbyB6PviSfXtJuSqGuX5bDBOruMKu22PZHX6DLotfHAbvqarzInQnXYhOfpY9KnEa_8vfkg


Ingredients


1 3/4 cups Unbleached All-Purpose Flour
1 1/2 cups Semolina Flour
1 envelope Active Dry Yeast
1 cup warm water
Salt

To Serve: fresh chopped rosemary, salt and olive oil

Directions:

Combine the two flours with 1 teaspoon of salt.

In a small cup, dissolve the yeast and a 1/4 cup of the warm water. Let sit until bubbly.

Add the yeast mixture to the flour with the rest of the water. Mix until you have a smooth dough. Cover and let sit 1 hour.

Knead for 5 minutes and cover for another hour.

Preheat the oven to 475 degrees F. Spray two flat baking sheets with oil spray. Knead the dough once more and divide into 8 equal balls. Roll each ball out as thinly as you canand place on the baking sheets.

Bake each pan for 5 minutes in the preheated oven.

The breads should blister but not brown. Remove from the oven and pile one on top of the other. Place a board or flat tray on top and let sit until cool.

To prepare for serving:

Return each bread to the oven for 10 minutes or until golden and crispy. Remove, brush lightly with olive oil, sprinkle with fresh chopped rosemary and salt and return to the oven for a few minutes. Serve warm.

Source: http://jovinacooksitalian.com/2013/09/16/italian-flatbreads/
 

sister herb

Official TTI Chef
Piadina

Piadina or Piada is a thin Italian flatbread, typically prepared in the Romagna region (Forlì-Cesena, Ravenna and Rimini). It is usually made with white flour, lard or olive oil, salt and water. The dough was traditionally cooked on a terracotta dish (called teggia in the Romagnol), although nowadays flat pans or electric griddles are commonly used.

The Piadina has been added to the list of the traditional regional food products of Italy of the Emilia-Romagna Region.

img_7981.jpg


Makes 8

500g (3 1/2 c) Plain flour
1 tsp Bicarbonate of soda
1/2 tsp Finely ground sea salt
100ml (1/3 c) Olive oil
200ml (1 scant cup) Warm water

1. Place the flour, bicarbonate of soda, salt & olive oil/lard in a large bowl.

2. Gradually add the water stirring with loose fingers until the mix comes together to form a soft dough.

3. Turn out on to a lightly floured surface & knead until the dough becomes smooth & shiny, this should take about 5-10 mins.

4. Divide into 8 equal balls, loosely cover with lightly oiled cling film & allow to rest for 30 minutes.

5. Heat a non stick cast iron skillet over a high heat for 5 mins.

6. On a well floured surface flatten each ball & roll out into a disc 2-3 mm thick, prick all over with a fork.


7. Place a disc of dough flat in the centre of the pan & press down gently. Cook for 2 mins or until the dough is crisps & brown spots begin to appear then flip & repeat on the other side. (I found that turning the heat down to medium to cook worked quite well.) Cook the piadina one at a time until all the dough is used. Cover with a clean t-towel to prevent them drying out whilst you prepare your desired filling.


Source: http://www.curiouscuisiniere.com/piadina/
 

sister herb

Official TTI Chef
Breadsticks (grissini, dipping sticks) are generally pencil-sized sticks of crisp, dry bread originating in Turin and the surrounding area in Italy. They are originally thought to have been created in the 14th century; although according to a local tradition, they were invented by a baker in Lanzo Torinese (northern Italy) in 1679.

Breadsticks may be offered at the table in restaurants as an appetizer. In some instances or regions they may be a type that is larger than pencil-sized. They may also be combined with ingredients such as prosciutto as an hors d'œuvre.

Regions that consume breadsticks include the Americas, Europe (mainly Spain, Italy and Greece), and parts of Asia.

Pre-made, dried breadsticks may sometimes be sold in markets as a kind of snack or a pre-meal appetizer for home use, somewhat similar to a cracker.

Another recipe for breadsticks, called rosquilletas, exists in Comunitat Valenciana (Spain).

Ingredients

flour - 400 g
water - 100 ml
fresh yeast - 20 g or a sacket of dry yeast
salt - 2 tsp
olive oil - 3 tbsp

Instructions


In a bowl melt the yeast with the lukewarm water then add the flour, the olive oil and the salt


Work the dough with your hands and make a smooth ball. Put the dough back in the bowl, cover it up with a cloth and let it rest in a warm place for an hour


Cut the dough and make small balls, then with your hands roll them on the table and make long and thin sticks. Pull them on both sides to make them thinner


Line them up on a baking tray over a sheet of baking paper. Cover them up with a cloth again and let them rest for another hour


Cook them in a hot over at 180 C for 20-25 minutes. They should look slightly golden but not too dark. Store them in an airtight container.


Source: http://www.mylittleitaliankitchen.com/grissini-rustici-italian-rustic-breadsticks/
 

sister herb

Official TTI Chef
After few example of Italian breads, let´s jump to the Africa.

Few Somali breads:

Macsharo Yariis (Mini Rice and Coconut Cakes)

Macsharo-yariis.jpg


These delicious bite sized rice cakes are a traditional Swahili breakfast and snack favourite, but I was delighted when I encountered them in the coastal cities of southern Somalia. They are crunchy outside, and soft and fragrant inside.

Ingredients

2 cups basmati rice (soak overnight)
¾ cup coconut powder
1 tablespoon of instant yeast
¾ cup sugar
2 teaspoon plain flour (optional)
¼ teaspoon ground cardamom
1 – 1 ¼ cup milk
Oil for cooking

Instructions


1. Blend all the ingredients together to a smooth batter.
2. Add ¼ cup water if the mixture looks too thick. You need a pancake like consistency. Let the batter rest until it doubles in size. This should take about an hour or so.
3. Brush oil over the Aebleskiver pan and place on stove over medium heat.
4. Pour the mixture using a spoon and fill to the top.
5. Reduce the heat to low to allow the batter to cook through. You will notice tiny bubbles on the batter. This means they are cooking nicely. When brown at the bottom, use a skewer or wooden toothpick to flip and cook the other side.
6. Cook the rest of the rice cakes and place on a platter to serve.


Somali Polenta Flat Bread (Muufo)

6a016303f3fe31970d01a3fcc73713970b-800wi.jpg


Traditionally, Somalis bake muufo in a special clay oven called tinaar that is heated by charcoal. The muufo is flattened and stuck on the walls of the tinaar. No oil is ever used. You know the muufo is ready when it falls off the wall. Muufo is a wonderful bread to serve with soup or stew.

Ingredients

2 cups white or yellow corn flour (polenta)
2 cups self-raising flour (you can substitute corn flour or semolina for wheat if you want to keep it gluten free)
1 teaspoon salt
1 sachet dry yeast
1 clove garlic, minced
1 teaspoon ground coriander seeds
1 teaspoon ground cumin seeds
1 ½ cups water

Instructions


Mix all the dry ingredients together.

Add the water slowly until you get a sticky, stretchy dough.

Cover with a clean cloth and let the dough rest until it has proved nicely.

Heat up a non-stick frying pan until it is hot.

Scoop two large tablespoons of the mixture onto the pan and spread into a circle shape. Cover with a lid and cook for about two minutes.

Flip the muufo and cook for another two minutes.

Repeat until all the dough is cooked.


Somali Kibhis

6a016303f3fe31970d017c372cf7c6970b-800wi.jpg


A healthy, unleavened bread that you can whip up in a jiffy. Somali Kibhis is absolutely delicious when eaten piping hot from the pan with a curry.

Somali Kibhis is commonly made in this way by Kenyan Somalis, and is no doubt, borrowed from our Indian friends as it is similar to the Indian chapati or roti. Nonetheless, it has become a staple in the Somali kitchen and one that we love!

Serve hot with a curry such as Green coriander chicken or a lentil dish.

2 cups whole wheat flour
½ salt
2 teaspoon olive oil or subag (ghee)
¾ cup warm water
Flour for kneading and dusting

Instructions

1. Mix the flour and salt in a large mixing bowl.
2. Add oil and mix until all lumps are gone.
3. Add warm water a little at a time to form a medium soft dough ball.
4. Divide the dough into 12 small balls and let them rest for about 10 minutes.
5. Heat up a frying pan or skittle on medium heat.
6. Using a rolling pin, roll out each ball into a thin, medium sized circle. Dust the dough with some flour to keep it from sticking to the rolling pin.
7. Place the dough on the frying pan and cook until it begins to rise slightly.
8. Flip the bread and cook on the other side. It should puff up. Press it with a flat spoon. This will make it puff up some more.
9. Wrap the kibhis in a tea towel to keep it warm.
10. Keep cooking the rest of the dough in the same way.


Sabaayad (Somali Flatbread)

6a016303f3fe31970d019b0079a09c970d-800wi.jpg


Sabaayad is similar to the Indian paratha. This is versatile bread that can be eaten for breakfast, lunch, dinner or just by itself. For breakfast it is eaten with muqmad (dried camel or beef jerky) or fried eggs and a cup of tea. For lunch or dinner it can be accompanied by beef, chicken or vegetable curries. My favourite way to eat it is to drizzle some honey on the sabaayad.

2 cups of all purpose white flour
I cup of wholemeal wheat flour (called atta in Indian grocery stores)
2 tablespoonfuls of oil (use ghee or as we call it subag which you can get in Indian or Somali grocery shops)
½ teaspoon of salt
1 cup of water or enough to mix for a firm and elastic dough
½ cup of oil for cooking
½ cup of floor for keeping the dough smooth when rolling

Instructions


1. Mix all the flour together with the salt. Add the oil and mix in thoroughly. Add in the water slowly as you knead the dough. When you are satisfied that you have a firm and elastic dough you know you’ve got it right. Let the dough rest for about half an hour.
2. Cut the dough into eight equal portions. Roll out each portion into a circle. Spread one teaspoon of oil and rub it gently all over the surface of the dough. To make the sabaayad square shaped, use a rolling pin to roll the circle and fold it into a square. This will allow you to achieve a square shape when you roll the dough. If the dough is sticky pat it with some flour.
3. Heat up a frying pan or griddle on the stove. When hot place the thinly rolled dough and let it cook for a minute or so. Once it starts to puff up flip the sabaayad and immediately spread a teaspoon of oil on top. Use a spatula to press down the bread all around. This makes it puff up more evenly. Flip and cook on the other side.
4. Remove from the heat and place on a plate. To show off the flakiness of the bread my grandmother used to gently smash the sabaayad from two ends before wrapping it up in a cloth to keep it warm. Serve while hot.

Source: http://www.somalikitchen.com/category/bread/


Just a few variations of Somali breads... hopely our Somali members can post here some of their favourites too. :SMILY259:
 

sister herb

Official TTI Chef
Chinese breads

Oven-baked breads are far from Chinese bread; and for that matter, so are sandwiches. This is not because the Chinese do not have leavened flour products, they do. Nor is it because they do not layer or stuff foods into bakery products, they do that, too. It is because both looks and tastes of Chinese breads are not relatives of those westerners think of when they say or think 'bread.'

The first leavened flour foods in China were steamed. These were called man tou; they became popular circa 300 CE. They were individual portion-size items, meat filed, and most often served in the spring. Steamed, fried, and baked dough products without filling became popular in and after the 19th century. About the same time, bread-types that westerners usually slice also became popular; but used differently.

The Chinese did have breads made from wheat, barley, glutinous and non-glutinous rices, sorghum, millet, soy beans, and more recently from corn; and the stuffed things in them. These early filled foods were wrapped with leavened dough that were able to rise due to molds such as Aspergillus oryzae or Aspergillus niger. These related simple single cells and others were early leavening helpers. There were others including yeasts and other single-cell plants in the Saccharomyces family including S.cervisiae; bacteria were also used including the Acetobacter or the Lactobacillus families. 'Fungal amylase" was another leavening agent used to rise or ferment the various grains, sprouted or not.

No matter the grain, all were made wet and mixed with one or more single-cell plants, animals, or fungi and then left to bubble and rise. These made what we might call starters. After this fermentation, additional flour or flours were added, the pastes shaped, many allowed to rise again, and finally heated to fix and cook the dough. Pastes made with more water and not stuffed or left to rise were intended as porridge. Most of these cereal foods were not sweetened as were the breads. The early Chinese breads were often sweetened and almost always stuffed. Many were mixed or topped with sesame seeds, peanuts, coconut, dried fruits, even eggs as a wash, or whole or half as a decorative topping. Historians believe that the Chinese learned about baked breads from outsiders. Iranians and Turkish people are credited as sources for this knowledge. A few say their knowledge may have come from others in the Middle East.

Rice and sorghum were indigenous to China, wheat and barley China's first imported staple foods. These and other flours were used as outer casings for meat, vegetable, and egg mixes. The wheats used were neither primitive varieties such as spelt, nor were they ones now used for pasta, such as durum wheat. They were soft and hard wheats, and when they first came to China, knowledge of how to grind them did not exist. That came about the same time as did the making of bread.

When ground, wheat, rice, barley, and many other flours did become popular, their earliest uses are said to be for dumpling wrappers and for noodles. Bread-making came later. Early on, the Chinese did learn to remove the gluten from the wheat grain to make imitation vegetarian meat substitutes for the Buddhist populations. Wheat was not the only item used to make into flour and then steamed, fried, or baked into bread. Ground mulberries were used as were dried ground bananas, other fruits, and many beans and pulses.

Breads, at times, were more than food; though that certainly was their primary use. As in other cultures, breads carried messages, particularly in time of war. Moon cakes carried military-type messages in the 14th century when the need for rebellion against Mongol rulers needed sharing. Nowadays, a small bread product that came to China from the United States, the fortune cookie, still carries messages.

Breads were used for food and they were food for the gods. Different kinds were used as offerings; and these were changed daily. Some were baked, others steamed, and still others were fried. A few were sweet and somewhat cake-like. For example, on the first day of each new moon, rolled fried cakes were proffered. Steamed rolls stuffed with mutton were a sixth day offering. Clover honey biscuits were temple offerings on the seventh day of a month, steamed sugar-biscuits were offered to the gods on the ninth day, and open-oven baked breads, now commonly called shao bing were offerings for the eleventh day.

Other monthly bread-like offerings included biscuits with fillings, steamed short-breads, sugar cookie-breads leavened and unleavened, puff-pastry baked breads, fat-filled pastries, and many other bakery-type items.

Dumplings are a form of bread. They can be wrapped in leavened or unleavened wrappings. Nowadays, most use an unleavened wrapping, but there are many types of dumplings made with raised dough. Their fillings can be sweet or not.

Dumplings are generally categorized by how the dough is made. Some are made with cold water, others with hot water, some include yeast or other leavening agents, and some are made with oil instead of water, or with both oil and water.

Dough that uses wheat flour with gluten is more commonly made with cold water or with oil. It has many uses and there are many cooking techniques for its products. Those that use cake or other flours are best baked or fried. Others with small amounts of gluten are steamed, baked, fried, or deep-fried. Hot-water dough makes for chewy products, as does high-gluten flour-dough products. And all flours with gluten, must rest after mixing to make for a better texture.

Chinese Steamed Meat Buns (Baozi)

img_8719.jpg


Prep Time: 3 hours
Cook Time: 30 minutes
Total Time: 3 hours, 30 minutes
Yield: 21 - 24 Buns


Ingredients

For the dough
500g all-purpose flour, more as needed
1.5tsp instant yeast
50ml lukewarm water
230ml milk or water +/- 10ml, at room temperature
1tsp baking powder
50g sugar
3g salt
2tbsp cooking oil
1/10tsp baking soda (optional)
For stuffing
1.5lb ground meat (can use chicken, beef, or lamb)
¼ cabbage
5 scallions
2inch fresh ginger root
Stuffing Marinade
2tbsp soy sauce
2tbsp cooking oil
1tbsp sugar
(1.5tbsp Chinese rice wine - use soy sauce as substitute)
1tsp five-spice powder
1 egg
1tsp sesame oil
2tsp ground white pepper
Additional salt to taste


Instructions
Follow basic steamed bun (Mantou) recipe to make the basic dough. You’ll need about 2 – 3 hours to prepare the dough
While waiting for the dough to rise, start making the stuffing by chopping the scallions and ginger
Chop the cabbage to the size of ½ of your pinky nail. Move the chopped cabbage to a mixing bowl
Mix 1 tbsp of salt into the cabbage. Let sit for about 20 minutes or until cabbage has released some moisture
Remove the cabbage liquid. Combine with the ground meat in the same bowl. Add the chopped scallions and ginger to the pork and cabbage
Mix in all the stuffing marinade ingredients to the meat except the cooking oil. Whisk the stuffing using a spoon until all the ingredients are well incorporated. Add additional salt to taste if needed
Drip the cooking oil in the meat mixture and whisk to mix. Seal the stuffing with plastic wrapper and chill in the fridge for at least 30 minutes. This can be done in advance
Once the dough is ready, transfer the dough to a flour-dusted workstation. Divide into 4 portions. Roll each portion into a log that’s about 1.5 inch in diameter
Cut the log into 6 parts and shape each port into a ball. Make sure you coat the dough balls with a layer of flour. Press down the ball with your palm. Using a rolling pin, roll the dough into a round thin wrapper with 4 inch diameter. When rolling, make sure the center of the wrapper is thicker than the edge of the wrapper. Repeat this step to make a batch of 6 wrappers at a time
To fold the bun. Place 1 to 2 tbsp of the filling in the center of the wrapper. Try to stack up the filling so it’s at least 1 inch from the edge of the wrapper. Wrap the bun by folding the edge counterclockwise until the bun is completely sealed. Repeat these two steps to assemble the rest of the buns
Place the buns on a bamboo steamer with parchment in between to prevent sticking. Don’t steam your buns right away but instead let them sit for another 30 – 45 minutes. This is an important step in making the buns soft and fluffy. The buns will rise in size
Steam the buns for 15 minutes over high heat. Turn off the heat but do not open the steamer cover. Let them sit in the steamer for another 5 minutes before you take them out. Let them cool a little and serve hot as breakfast, snack, or appetizers

Mantou (Chinese Steamed Bun)


Prep Time: 2 hours
Cook Time: 15 minutes
Total Time: 2 hours, 15 minutes
Yield: 8 buns

Chinese Steamed Bun is one of the most basic staples in Chinese cuisine. This step by step recipe will guide to through the process in making these soft buns at home.

Ingredients


400g All purpose flour
1 tsp instant yeast
30ml lukewarm water
200ml milk or water +/- 10ml
½ tsp baking powder
1tbsp cooking oil
40g sugar
2g salt
1/10 tsp baking soda (optional)


Instructions

Activate the yeast by combining the yeast with lukewarm water for about 5 minutes. The mixture will become milky and bubbly.
In a bread machine or stand mixer, add the flour, baking powder, salt, and sugar. Turn on the bread machine / stand mixer, and slowly add the activated yeast and milk/water.
When adding the milk/water, do it slowly and in batches. Also slowly add the cooking oil. Continue to knead for about 10 to 15 minutes as a dough ball is formed. Pay close attention to the texture of the dough. If it’s hard, add a little more water/milk. If it’s too wet or the surface is sticky, add a little more flour. At the end you should see a smooth, soft, but non-sticky dough ball.
Cover the dough with plastic wrap and side aside to rest. Depending on the room temperature, let the dough rest for 45 – 60 minutes or until the dough doubles the size. If the dough smells very sour, add a tiny portion of baking soda to reduce the sourness. Turn on the bread machine/ stand mixer once again and knead for about 5 minutes until smooth dough is formed.
Place the dough on a flour-covered work station, cut the dough into two halves.
Roll each half of the dough into a long log about 1.5 inch in diameter. Flatten the log using a rolling pin.
Lightly brush some water on the flat dough. Starting from one side of the flat dough, roll the dough towards the other end to form a log.
Remove the ends of the log and cut the remaining log into 4 equal pieces or the size of your choice. Repeat the previous 3 steps for the half of the dough. Place each piece in a wax-paper-covered steamer.
Do not steam the dough right away. Loosely cover the dough with a damped towel and let the dough rest and rise for about 30 minutes. The dough should become 1.5x the original size. Finally steam the dough over boiling water for 12 to 15 minutes. After you turn off the heat keep the lid on for extra five minutes to prevent the buns from becoming saggy.

Notes
Use milk instead of water if you want the buns to appear white


Step by Step Instructions

Activate the yeast by combining the yeast with lukewarm water for about 5 minutes. The mixture will become milky and bubbly.

1.jpg


In a bread machine or stand mixer, add the flour, baking powder, salt, and sugar. Turn on the bread machine / stand mixer, and slowly add the activated yeast and milk/water.

2.jpg


When adding the milk/water, do it slowly and in batches. Also slowly add the cooking oil. Continue to knead for about 10 to 15 minutes as a dough ball is formed. Pay close attention to the texture of the dough. If it’s hard, add a little more water/milk. If it’s too wet or the surface is sticky, add a little more flour. At the end you should see a smooth, soft, but non-sticky dough ball.

3.jpg


Cover the dough with plastic wrap and side aside to rest. Depending on the room temperature, let the dough rest for 45 – 60 minutes or until the dough doubles the size. If the dough smells very sour, add a tiny portion of baking soda to reduce the sourness. Turn on the bread machine/ stand mixer once again and knead for about 5 minutes until smooth dough is formed.

4.jpg


Place the dough on a flour-covered work station, cut the dough into two halves.

5.jpg


Roll each half of the dough into a long log about 1.5 inch in diameter. Flatten the log using a rolling pin.

6.jpg


Lightly brush some water on the flat dough. Starting from one side of the flat dough, roll the dough towards the other end to form a log.

7.jpg


Remove the ends of the log and cut the remaining log into 4 equal pieces or the size of your choice. Repeat the previous 3 steps for the half of the dough. Place each piece in a wax-paper-covered steamer.

8.jpg


Do not steam the dough right away. Loosely cover the dough with a damped towel and let the dough rest and rise for about 30 minutes. The dough should become 1.5x the original size. Finally steam the dough over boiling water for 12 to 15 minutes.
After you turn off the heat keep the lid on for extra five minutes to prevent the buns from becoming saggy.

9.jpg


http://yireservation.com/recipes/mantou-chinese-steamed-bun/
 

sister herb

Official TTI Chef
Step by Step Illustration

Make the dough.

step1.jpg


While waiting for the dough to rise, start making the stuffing by chopping the scallions and ginger

step2.jpg


Chop the cabbage to the size of ½ of your pinky nail. Move the chopped cabbage to a mixing bowl

step3.jpg


Mix 1 tbsp of salt into the cabbage. Let sit for about 20 minutes or until cabbage has released some moisture

step4.jpg


Remove the cabbage liquid. Combine with the ground meat in the same bowl. Add the chopped scallions and ginger to the meat and cabbage

step5.jpg


Mix in all the stuffing marinade ingredients to the meat except the cooking oil. Whisk the stuffing using a spoon until all the ingredients are well incorporated. Add additional salt to taste if needed

step6.jpg


Drip the cooking oil in the meat mixture and whisk to mix. Seal the stuffing with plastic wrapper and chill in the fridge for at least 30 minutes. This can be done in advance

step7.jpg


Once the dough is ready, transfer the dough to a flour-dusted workstation. Divide into 4 portions. Roll each portion into a log that’s about 1.5 inch in diameter

step8.jpg


Cut the log into 6 parts and shape each port into a ball. Make sure you coat the dough balls with a layer of flour. Press down the ball with your palm. Using a rolling pin, roll the dough into a round thin wrapper with 4 inch diameter. When rolling, make sure the center of the wrapper is thicker than the edge of the wrapper. Repeat this step to make a batch of 6 wrappers at a time

step9.jpg


To fold the bun. Place 1 to 2 tbsp of the filling in the center of the wrapper. Try to stack up the filling so it’s at least 1 inch from the edge of the wrapper. Wrap the bun by folding the edge counterclockwise until the bun is completely sealed. Repeat these two steps to assemble the rest of the buns

step10.jpg


Place the buns on a bamboo steamer with parchment in between to prevent sticking. Don’t steam your buns right away but instead let them sit for another 30 – 45 minutes. This is an important step in making the buns soft and fluffy. The buns will rise in size

step11.jpg


Steam the buns for 15 minutes over high heat. Turn off the heat but do not open the steamer cover. Let them sit in the steamer for another 5 minutes before you take them out

step12.jpg


Let them cool a little and serve hot as breakfast, snack, or appetizers

http://yireservation.com/recipes/chinese-steamed-meat-buns/
 

sister herb

Official TTI Chef
Oven baked Chinese bread: Shaobing

shao-bing-Chinese-oven-baked-bread-with-sesame-sauce1.jpg


Ingredients

Plain flour
dry yeast
salt
sesame paste
toasted sesame

Instructions


Prepare the dough as indicated in the main text of the post.
Knead the dough well, and leave for one hour or wait for it fully raised.
Dissolve 3 tablespoons of sesame paste in 1 tablespoon of water and ⅔ teaspoon of salt.
Divide the dough into smaller portions, around 4-5cm wide, around 7-8cm long, and about 3cm thick.
Roll the small dough into a flat sheet. (0.5cm thick, maybe)
Spread prepared sesame mix on the flat sheet.
Roll up the ‘sheet’ tightly.
Place the roll ‘standing’ on the board, use both hands to hold each end of the ‘roll’, and twist as many rounds as you can.
Use your palm to press the top of ‘twisted’ roll down the bottom.
Sprinkle toasted sesames on top of the ‘dough’, enough to cover the top surface, and press them well into it.
Place well prepared shao bing into pre-heated oven for 15-18min.

Note: As here isn´t mention about temperature of oven, I guess it might be between 200 to 225 C.

Chinese Shao Bing

Shao bing always been one of my all time favourite food. I just love those crunchy layers and the smell of sesame. However, I only just learnt how to make shao bing in very recent years. Since I could not get it over here, and I was dying to have it, I tried very hard to recall how my auntie made it, then I came up with these ones. :)

Shaobing is one of the most popular ‘bakeries’ in China, or probably we say that it is a ‘dian xin‘ from North China. Here, you probably can see the difference between North Chinese food and Cantonese food.

I just noticed that in some English translations, shao bing is referred to as ‘flat bread’. Well, if it is just ‘flat’ ‘bread’, there are far too many flat breads in Chinese food.

Types of Shao bing


The most famous shao bing comes from Shandong Province. They come in different varieties and with different fillings, for example, sugar, red beans, spring onions… Normally, the surface is very crispy, and the inside has many different layers. And in different regions, people eat them together with different types of food. For instance, in the South, people might have it with soya milk for the morning breakfast, whereas in the North, we have the savory ones with soup, and sweet ones as side dish or just as snack. The one with sesames is the basic one. It takes probably 20 minutes to make around 10 of them after preparing the dough — fairly easy and quick… and tasty. Good for a weekend treat, and if you make some more, you will have good breakfast (much better than just having toasts) — for a change. :))

Shao Bing: The recipe


Ingredients:


Plain flour, dry yeast, (or self-raising flour) salt, sesame paste, toasted sesame

Preparing the dough:


(if you are using plain flour and yeast to raise the dough, not self-raising flour)

The amount of flour needed depends on how many you want to prepare. I normally use four and half cups of plain flour, and 1 sachet of dry yeast (7g) for the making around 10 -12 shaobing, mixed with one and 1/3 cup of warm water, and 2 teaspoons of salt.

Knead the dough well, and leave for one hour or wait for it fully raised.

Preparing the ‘filling’:


Dissolve 3 tablespoons of sesame paste in .. probably 1 tablespoon of water and 2/3 teaspoon of salt — the sesame mix is supposed to be a bit salty, so it all depends on your taste. The mix should be neither liquid, nor very thick.

Oh, I have always been a bit lazy about dissolving the sesame paste, and lately, I found a lazy solution :))

The bottle of sesame paste sold in supermarkets always contains some ‘oil’ on the top, whereas the paste itself sinks down to the bottom. I use a small spoon of ‘oil’ mix into the paste first, it basically takes no time to mix it well, then add a some water to dissolve it further — way more easier than just adding water. —- Don’t tell this to my mum, otherwise she would ask, “how can you grow up and become more and more lazy?” — It is true, I remember that, when I was little, dissolving sesame paste was the only thing I could help my mum with when she prepared cool noodle dishes, and I was so proud that I could help, I whisked the paste so hard until my wrist got sore. And now…. I am trying to find the laziest solution. :))

Shaping Shaobing:


1) Divide the dough into smaller portions, around 4-5cm wide, around 7-8cm long, and about 3cm thick.


2) Roll the small dough into a flat sheet. (0.5cm thick, maybe)


3) Spread prepared sesame mix on the flat sheet.

4) Roll up the ‘sheet’ tightly.


5) Place the roll ‘standing’ on the board, use both hands to hold each end of the ‘roll’, and twist as many rounds as you can (one hand should firmly hold the end ‘stand’ on the board, so the bottom is not moved).


6) Use your palm to press the top of ‘twisted’ roll down the bottom.

7) Sprinkle toasted sesames on top of the ‘dough’, enough to cover the top surface, and press them well into it.


Adding toasted sesame

http://cookingsimplechinesefoodathome.com/2011/05/14-chinese-bakery-shaobing.html
 

sister herb

Official TTI Chef
Pinnapple Bun "Bo Luo Bao"

IMG_7667-2.jpg


Ingredients:

For the tangzhong
50 g bread flour
250 ml water

For the Dough:
210 g Bread flour
56 g Cake flour
20 g Milk powder
42 g Granulated Sugar
1/2 tsp Salt
6 g Instant Yeast
30 g Egg (a little less than 1 whole egg, depending on your egg size)
85 g Water
84 g Tangzhong
22 g Unsalted butter

For the Topping:
55 g Unsalted butter
55 g Icing sugar
25 g Egg (about 1/2 of a large egg)
2 tbsp Milk powder
130 g Bread flour
Egg yolk for brushing (I used the remaining amount leftover from recipe)

Directions:


1. Tangzhong must be made ahead of time and allowed to cool for several hours in the fridge. To make tangzhong, mix the flour and water in a small sauce pan until flour is completely dissolved. Place sauce pan on stove on medium heat. Stir continuously and also measure temperature with a thermometer. As it approached 65 C, the mixture will thicken and lines will begin to form when you stir. Once it hits 65 C, turn off stove, remove pan from heat and place in a container and cool in the refrigerator for several hours. The recipe makes more tangzhong than needed for this recipe. However, this is the easiest ratio of water to flour needed for tangzhong. You can use the rest to make another more bread, or store it in the fridge for a few days.

2. For the dough: Using a stand mixer with the dough hook attachment, combine all ingredients listed under the dough section except the butter. Mix until dough begins to form, then add in butter a little at a time until it is fully incorporated. Continue to let the dough mix on medium speed until dough is no longer sticky and becomes elastic, about 10 minutes.

3. Grease a bowl with some oil. Place dough in the greased bowl and cover with plastic wrap. Let rise for about 1 hr until doubled in size.

4. For the topping: While dough is proofing, make the topping. Whip the butter until soft and sift in the icing sugar and mix well. Add in the egg and stir until combined. Fold in the milk powder and half of bread flour. Mix with a plastic spatula. Gradually add in the rest of bread flour. The topping will be very sticky. I suggest rolling it out between two sheets of plastic wrap or parchment paper and sticking it in the fridge for an hour to firm up.

5. Take chunks of dough and divide into 8 balls. Make sure your dough balls are smooth and that the bottom ends are securely tucked under so that they do not open up during the second round of proofing. Let the dough rest for about 15 minutes.

6. Divide the topping into 8 portions. Place one portion on each bread. Mold it to fit the top of the bread with the palm of your hand, pressing down gently to spread the topping. The end result should be a thin layer covering most of the surface of the bread. Use a sharp knife to make criss crosses, like a checkerboard across the top of the topping (careful not to cut into the dough). Let dough rest for an additional 40 minutes.

7. Brush on egg yolk on tops of each bread and bake in a preheated 180 C/350 F oven for about 15 minutes.

http://www.theravenouscouple.com/2011/07/pinapple-bun-bo-luo-bao.html
 

sister herb

Official TTI Chef
Egg Custard Bun Filling - Lai Wong Bao

6a00d8341ef22f53ef0147e3b6f03e970b-500wi


Dough: recipe of Chinese Steamed Meat Buns (Baozi) above


Makes a scant 1 1/4 cups

1/4 teaspoon salt
2 tablespoons custard powder
1/2 cup sugar
About 2 1/2 ounces (1/2 cup) cornstarch
1/2 cup coconut milk
2 tablespoons sweetened condensed milk
2 tablespoons unsalted butter, cut into 3 or 4 pieces
2 large egg yolks
1/2 to 1 teaspoon vanilla extract

1. In a saucepan, whisk together the salt, custard powder, sugar, and cornstarch. Whisk in the coconut milk and condensed milk. Heat over medium heat, stirring constantly, until smooth. Add the butter and continue stirring until the butter has melted.

Keep stirring for about 6 minutes, until the mixture has thickened substantially. If it seems hard to stir with the whisk, switch to a spatula. As the mixture stiffens it may look like there are lumps. If you see that, stir more vigorously to break the lumps up and evenly cook. Aim for a smooth texture.

2. When the mixture is thick enough to stick to the whisk and form a soft peak, move the pan off the heat and whisk in the egg yolks. This will thin the mixture out slightly for the moment. Return the pan to the heat and keep whisking to ensure that the yolks are well incorporated.

Continue vigorously stirring for 1 to 2 minutes more, until the mixture thickens to the point where it cleans the sides of the pan and easily comes together as one smooth mass. If you have ever made dough for cream puffs, this is very similar. Stir in the vanilla, then take the pan off the heat. Stir it occasionally for a few minutes to quickly cool it.


At the end, stir the mixture off the heat for a minute and taste it. Make any changes you like at this point, as I suggest above. When you're satisfied, transfer the filling to a bowl, spreading it out.

3. After the filling has cooled, form it into balls.For my 16, each one was about 1 1/4 inches wide, like an extra- large or jumbo egg yolk! Loosely cover and set aside at room temperature, or refrigerate to firm up, until your dough is ready. Then use the balls of filling when you shape the buns. Do the second rise and steam like in the recipe of Chinese Steamed Meat Buns (Baozi)


Note

Should the filling be too soft after it has cooled, portion it into generous tablespoons, dropping it onto parchment. Loosely cover with plastic wrap and refrigerate to firm up. I found that you can leave it in the fridge until you’re ready to shape the bao. However, a cold filling slows down the second rising so be patient.

http://www.vietworldkitchen.com/blog/2011/04/egg-custard-buns-recipe-lai-wong-bao.html
 

sister herb

Official TTI Chef
Mexican Breads

If there is something that Mexicans look for to eat at the time for breakfast or dinner is a delicious piece of sweet bread. In Mexico, bread come right after tortillas as the second most eaten food in the country. Now, we are not talking about bread that is sold in plastic bags at the supermarkets, we are talking about traditional and authentic Mexican bread. The list of styles, forms, flavors and names is quite long, but some of the most recognized names are: conchas, bigotes, chilindrinas, elotitos, limas, ojo de buey, polvoron, pata de mula, tostada, picon, mantecado and many many more.

They are baked on places called “Panaderias” bakeries where you go, take a bread platter and tongs and pick your favorite breads.

mexican-bread.jpg


Families have the custom to get bread in the morning, when many of the bakeries make early morning fresh and warm bread, and they keep it for the day, maybe to have a dessert after lunch or dinner along with a cup of hot chocolate, champurrado or just plain milk.


A bolillo or pan francés (meaning "French bread") is a type of savory bread traditionally made in Mexico. It is a variation of the baguette, but shorter in length and is often baked in a stone oven. Brought to Mexico City in the 1860s by Emperor Maximilian’s troupe of cooks, its use quickly spread out throughout the country.

It is about 15 cm (six inches) long, in the shape of an ovoid, with a crunchy crust and a soft inside known as migajón. It is the main ingredient for tortas and molletes. A variation of the bolillo is the telera, which is very similar, though it has a more rounded shape, is divided in three sections, and is usually softer. Other variations include bolillos made of alternate ingredients such as whole wheat, wheat germ or flax.

Bolillo

1766756401_7aa5a04ea0_o.jpg


4 cups bread flour
1 teaspoon salt
1 teaspoon sugar
1 package yeast
2 cups warm water
1 egg white, whisked

Pour water into a large mixing bowl, and sprinkle yeast onto it. In a separate mixing bowl, mix flour, salt and sugar. Add flour mixture to water a little at a time and mix until a dough forms. Place dough in a greased bowl, cover with a towel or cloth and leave in a warm place for about an hour.

Remove dough from bowl, punch it down and knead for about 10 minutes. Divide dough into 10 balls. For oval shaped rolls, roll the balls between your palms for about 5 seconds to make a cylindrical shape, tapering slightly at the ends. Cover and let rise again for about 30 minutes.

Preheat oven to 375 degrees F/190 C and brush each dough ball with egg whites. Score each roll with two, 2-inch lines along the top, about 1/4 inch deep. Bake for about 30 minutes.

Source: http://mexicanfood.about.com/od/savorysides/r/torta.htm
 

sister herb

Official TTI Chef
Flour tortillas are more common in the northern states of México.

Tortillas+de+Harina1a.jpg


2 1/2 cups All Purpose Flour, plus extra to form tortillas.
1 teaspoon salt
1/2 teaspoon baking powder
1/3 Cup shortening or Lard
1 cup hot water * See Note

*Note 1: Add the water little by little to from the dough since in humid climates a slightly less amount of water will be needed.


Directions:
1.
In a large bowl, place the flour, baking powder, salt and mix. With the help of a fork, pastry blender or your hands, incorporate the shortening or lard until it resembles coarse meal.
2. Slowly add the hot water a little at the time until the dough holds together. Do not add all the water at once. See note above.
3. Turn dough onto a work surface, and knead for a couple of minutes until it is smooth.


4. Divide the dough in 10 pieces rolling every piece in your work surface with the palm of your hand to form a little disk . We call these “testales”.


5. Cover the “Testales” in a damped kitchen towel or plastic wrap, and let the dough rest for 30-45 minutes.

Note 2:
The resting period will develop the gluten and forming the tortilla disks will be easier. Do not skip this step.


6. After the resting period, place an ungreased griddle/comal over medium heat. Grab your Rolling Pin
ir
to start forming the tortillas on a lightly floured surface. If you add too much flour to the surface your tortillas will be dry.

Flour-TortillasB_thumb8.jpg


7. To form the tortillas place the “testal” (ball of dough)onto the working area and press slightly with your hand, set the rolling pin at the center of the “testal” and press forward without making it to the edge and then press backwards towards yourself stopping before the edge. Turn the tortilla 45 degrees (like a half turn) and repeat pressing forward and then towards you. Flip the tortilla and repeat the same process until you have a thin disk of about 10 inches. If you are new to rolling tortillas, be patient, it takes a little practice.

Flour-Tortillas23_thumb8.jpg


8. Now, place the tortilla in your already hot Griddle
ir
or comal.

This step is a really quick one: be careful with your timing.

a) During the first 20 to 30 seconds, the tortilla starts forming air bubbles and light brown spots will show at the bottom side of the tortilla,

b) turn the tortilla, and during the next 20 seconds, more air bubbles will continue to from.

c) turn again; at this time the tortilla will puff up like in the picture above. This last step will take about 10 seconds. Remove the tortilla and wrap with a kitchen towel. Keep making the rest of the tortillas.

Extra Notes:

*Your comal/griddle should be hot enough so that when cooking the tortillas the spots are light brown; if they are dark brown to soon then the heat is too high, and if the tortillas take longer to cook then the heat is too low.

* To store the tortillas place them in a plastic bag in the refrigerator.

* To reheat the tortillas, place them in a hot griddle/comal and warm them the same way you cook them, turning twice. The air bubbles will form again but not as big as when they were just cooking.

Source: http://www.mexicoinmykitchen.com/2012/12/how-to-make-flour-tortillascomo-hacer.html
 
Top